
Access to your data in the Research Area and the Vault
Once you’re registered in the I-Lab you can get access. Depending on your rights within a usergroup you can add/rename/move/delete files and folders in the Research Area and retain datapackages from the Vault via your PC or Laptop. If you’d like to use other devices, like a tablet, please check How to Access the I-lab via a third-party WebDav-client .
There are several ways to get access to the files and folders of your usergroups in the Research Area and your datapackages in the Vault.
The easiest is by setting up either a network share or mounting a network drive. By mounting a network drive, you’ll get a drive-letter, like ‘Y:\’, which in turn enables you to have scripts of manipulate your data in the storage directly.
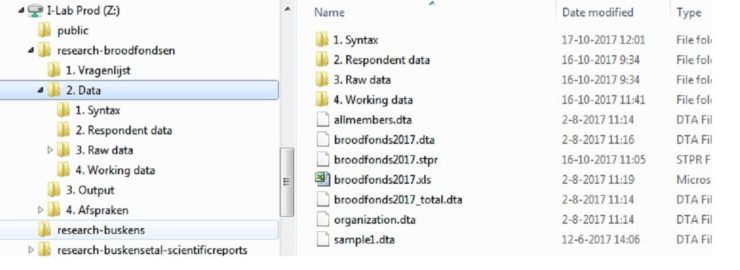
Once you’ve mounted the I-Lab you see all the usergroups you have access to. Each usergroup is prefixed by research-.
Each usergroup has its own vault, which is prefixed by vault-.
Mounting a Network Drive
You can mount the I-Lab storage as a Network Drive in your file-manager, eg. Windows Explorer on a Windows-machine and the Finder in an Apple. The web address you need to connect to is https://i-lab.data.uu.nl.
For the following example, we’ve used the Windows Explorer.
- Open the Windows Explorer, choose menu-item Tools -> Map network drive
- Click the link Connect to a Web site that you can use to store your documents and pictures at the bottom of the dialog.
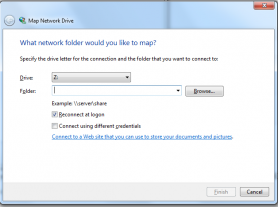
- Start the wizard by clicking next and type in the box where you are requested for the address for the website, FTP-site, or network location: https://i-lab.data.uu.nl.
- Pick a suitable drive letter
- Tick the checkbox Connect using different credentials (as you use your mail adress rather then your solis-id)
- Think up the name which you want the drive to have in your Windows Explorer, e.g. I-Lab.
You will be prompted for your username (= your UU-mail adress) and password (= your solis-password) and a network-drive will be mounted.

If you want to, you can right click the newly created network-drive and change its name.
Mounting a Network Share
Instead of a mounting a Network Drive you can choose to add the I-Lab as a Network Share. You can do so by following the same procedure as sketched above, except instead of providing the connect string and drive-letter in the first dialog, you choose Connect to a Web site that you can use to store your documents and pictures.
How to Access the I-lab via a third-party WebDav-client
It is also possible to access the I-Lab Research Area Data Storage via a third-party products as well, e.g. CyberDuck or NetDrive.
You can use these third party products when you for example want to have access to your data via a tablet.